Deep Clean & Winterize Your Garden Shed
Give your shed the royal treatment: clear-out, wash, repairs, pest checks, and tool care — ready for spring!
Step-by-Step Guide
1. Empty the shed completely
- Sort items into Keep / Repair / Discard.
- Move liquids to frost-safe storage.
- Bring small hand tools indoors.
- Sweep debris away from door threshold.
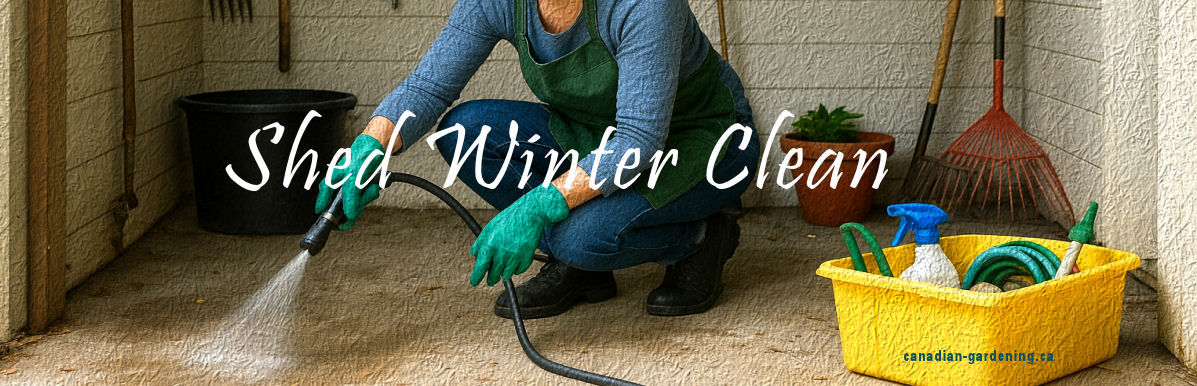
2. Spray-wash & clean interior
- Mix warm water + mild detergent (or 1:4 vinegar:water).
- Scrub floor & lower walls with stiff brush.
- Rinse and let dry thoroughly.
3. Inspect & do small repairs
- Check ridge cap & roof seams; reseal/repair as needed.
- Replace/patch bare wood and touch up paint.
- Clear gutters and downspouts.
Wasp nests: Remove only at night or dusk. Wear protective clothing or call a professional.
4. Tool cleaning & rust prevention
- Brush off soil and debris; rinse sticky grime.
- Dry completely; sun-dry if possible.
- Apply thin oil layer to metal parts.
- Treat wooden handles with boiled linseed oil.
- Hang long-handled tools off the floor; store small tools indoors.
5. Organize as you reload
- Frequently used items near the door.
- Sharps at waist height, not overhead.
- Group tools by function.
- Use bins and large, underlined labels.
- Store heavy items low; keep aisle clear.
6. Moisture control & pest prevention
- Place moisture absorbers or charcoal in corners.
- Seal small gaps with caulk/steel wool.
- Peppermint oil on cotton balls deters mice.
- Ensure ventilation to avoid condensation.
7. Final check & close-up
- Install battery-operated motion light for safety.
- Label chemicals and keep safety sheets accessible.
- Keep grit/snow-melt near the door.
- Create a spring reminder for tool check.
Shed Winter Prep — Quick Checklist
Tick off items as you go: